The Observatory - Please read our update below!
Years ago when I thought about an observatory I NEVER envisioned operating remotely from our house. That being said I am VERY glad I chose a dome structure. A dome versus a roll off roof type of observatory came down to wind and light pollution (our new site is located in a region with Bortle 2 skies so light pollution is not an issue). .
Each roof type has their strenghs and weaknesses for the observatory. A dome blocks the wind and annoying light from cities and road lights. The roll off roof is simple but it exposes the scope, mount, and computer to the elements; there would be no blocking of the wind so I would not be able to image as much as I would have liked. A solution to the wind I learn from years of operating a dome was to lower the scope into the structure to avoid winds, after all, who wants to image the horizon with all the haze and noise down so lo? A dome would range from $750 for an 8' wood-domed kit to $25,000 10' fiberglass dome.
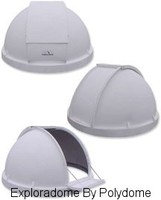
I wanted the Observatory to look like an observatory so having a dome would block the wind and increase the nights I could image so the dome was chosen. In the past I owned a Polydome Explora dome 8' dome and although it never leaked, I had issues with smooth rotation and the doors becoming stuck or failing to open. Due to the recent dramatic cost increase in the Explora Dome and my past experience I decided to search for another supplier.
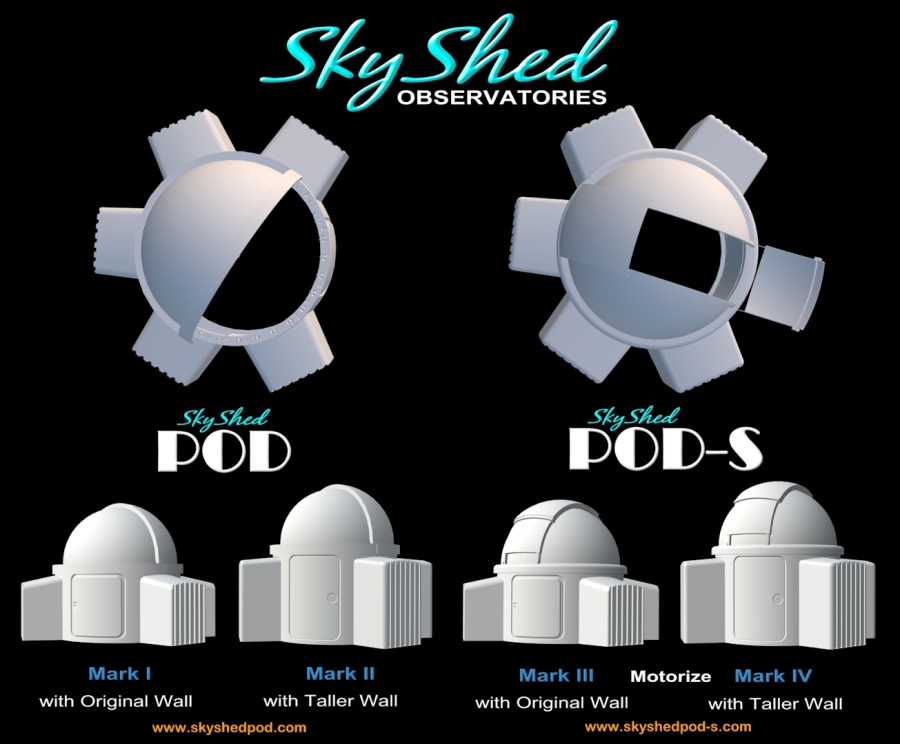
The hands-down winner for the dome was the Sky Shed POD-S 8' dome with four Mark IV bays. Wayne Parker, the owner and designer of Sky Shed, has been amazing to work with and very responsive to my questions and needs.
I received my July 11th and it has been sitting in my shop since then ready to make the trip to Junction once the slab, pier and electric are completed. As of August 31st we are good to move it up there. Now I need a volunteer crew to help tranport and assemble it!

Wayne at Sky Shed offers a solid product that will allow me to image confidently from over 2 hours away!
Building your new site 2 HOURS away will require as close to 100% reliability as possible.
Sky Shed's CMR control system is almost ready for public release and I have one reserved so I can begin automated imaging.


Tips On Construction
First off, should you choose to undertake this project of constructing your own observatory please keep in mind a few things prior to beginning your new temporary lifestyle:
1. Think about the future. We designed the observatory to be converted to a house once the skies lighten up due to new development. I figure the site will be used as an observatory for at least 15-20 years.
2. I collaborated on the project with my wife by designing a family area with adequate room for them to spend time there while I imaged or observed (this was the big sell for getting this job done). There is even room for them to comfortably sleep with cots we store under the observatory area.
3. Take the time to make this a 2nd home if you can make it work! Financially, you will be glad you did! Keep in mind that to be a 2nd home you will have to meet distance requirements from your primary home and you will legally have to have the amenities of a standard home (bathroom, separate sleeping area, kitchen).
4. Instead of building the structure yourself, take bids from contractors and I quickly discovered the work I was planning on doing myself a contractor could do the same job for a couple of hundred dollars more.
Think about this: If you can frame the project for around $2,000 but a contractor can do it for around $3,500, is the $1,500 worth the time and risk? Here is an example: Lets say you decide you can frame it yourself and it will take you 2 weeks to do so, do you have that much time off from work and do you have the tools and expertise to complete the project without it falling down around you? Chances are, you do have adequate tools to complete the job; but do you have the professional touch and experience to complete the project and have it last?
HERE IS THE KEY: HIRE THE RIGHT contractor, take your time to ask around and find a trustworthy individual to complete your project who has worked with someone you trust or perhaps a relative of a co-worker (as in my case). I have to thank Mr. Henry Ramirez Sr. his wife Barbara and Henry Jr. for their willingness to construct the observatory, they made it affordable and went above and beyond to make sure we had everything we needed to make this a structure that would last!
Observatory Quick Facts :
- The observatory property is 2.58 Acres
- The Cement Telescope pier is 12 inches in diameter, 14 FT tall and weighs over a ton
- 29 Cedar trees were cut down to clear the property
- The main telescope apeture is 140mm (5.51 inches)
- Lynn and I mounted the 100 lb. dome ring to a height of 12 ft using only a nylon rope
- Our internet access is DSL (no cable service available)
- 13 tons of material were needed to complete the road; all spread by neighbor and family member Jim Todd
- The cement pad at our entry weighs over 600 pounds
- The dome and telescope are synced by using Geometery calculations
- 68 sheets of 4x8 drywall were used to construct the finished walls
- The dome is 8 feet in diameter and is one molded piece
- It took me, Brothers Khail and Dan as well as Alex and Lionel Bila to mount the dome; it took 5 hours
- Robert Jr. earned a Boy Scout Elective by wiring 2 outlets and one light switch
- A cellular alarm protects this observatory
- Over 1,400 labor hours were required to complete this project
- To minimize vibrations during imaging, no part of the pier touches the observatory
- Many different types of fossils are found on this property
- The Pier base is 29” below the ground and was dug with a pick and shovel
- Over 1,000 feet of electric wiring was used during construction
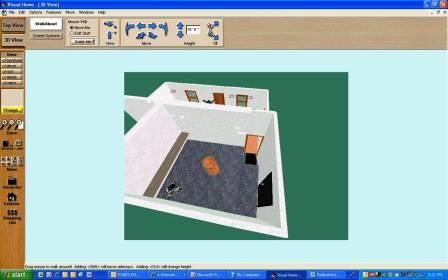
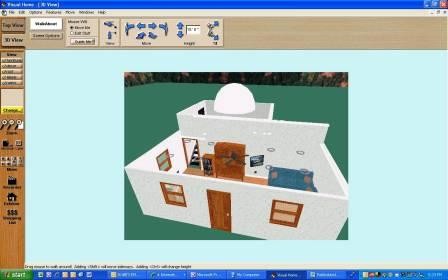
- Robert Sr., Lynn and Robert Jr. designed every part of the observatory
- This property was once at the bottom of the ocean
- There are 624 square feet in this structure, expansion will double this size in the near future
- The Electrical wiring, and power service from the electric company was done by Robert
- The front half of the observatory was designed to allow our family to spend time together
- The elevation of the observatory is 1,684 feet above sea level, San Antonio average, 680 Ft
- We are in Blanco County but our address is Spring Branch, in another county
- Ground breaking occurred on May 21st 2007
- There are two future doors already framed in this structure
- We receive digital TV signals from San Antonio, Austin, and Temple
- Roadrunners hunt Rattlesnakes; both have been seen on this property
- There is a 'Chimney' on our property which drains into the Edwards Aquifer.
- The pitch of the roof was designed to help hold down the dome by creating a backflow of winds around the lower portion of the dome